


Tempering Chocolate: Tips and Techniques
Chocolate is one of those ingredients everybody wants to have around when it comes to pastries and desserts. Its rich and diverse flavor is perfect to enjoy hot, cold, or even frozen. If you’re making your first steps into the kitchen and the world of chocolate, then you might’ve realized by now that tempering chocolate is no easy ride. In this article, we’ll explain what tempering chocolate is and the most effective and easy techniques to do it correctly.
What is Tempering Chocolate?
If you’ve ever bought a chocolate bar at the supermarket (and we know you have), you’ll notice how it has a nice, shiny look. It breaks with a strong “snapping” sound and it stays in its original shape at room temperature. Tempered chocolate is more stable and better for treats.
Untempered chocolate looks a bit dull, is softer rather than solid and it even has small patches or spots of grey and white. While untempered chocolate is totally safe to eat, it’s not as attractive as tempered chocolate, that’s why people temper chocolate to make it more attractive and easier to enjoy.
Things to Know Before Tempering Chocolate
There are some things to take into consideration before trying to temper chocolate for the first time:
● Make sure your chocolate is cocoa butter-based. It doesn’t matter if it's dark, milk, or white, it has to have cacao butter in order to temper it correctly.
● When a piece of chocolate has vegetable fats instead of cocoa butter, there’s no need to temper it.
● Some chocolate chips have special ingredients so they keep their shape even during baking (i.e chocolate chips for cookies). If you try to temper them they won’t melt down easily.
● Chocolate is very sensitive and can burn or scorch easily, that’s why you need to watch it never reach a temperature above 130º F.
Tempering Methods
Below you’ll find the most common chocolate tempering methods and techniques. While there are other more accurate techniques, they do require very specialized tools not anyone will have at hand.
Marble Tempering
Start melting the chocolate over a double boiler until it reaches about 50ºC/122ºF in temperature. Remove the chocolate from the double boiler and pour ⅔ of it over a marble countertop. Using palettes, start to agitate the chocolate back and forth and spread it across the surface of the countertop, then scoop it back to the bowl and spread again. The movement will allow the temperature to drop and reach a tempered state.
Balanced Tempering
For this method, you’ll heat ⅔ of your chocolate on the double heater and stir frequently until it reaches 50ºC/122ºF. Then, add the remaining chocolate once you’ve removed the bowl from the double heater. The cold temperature of the last chocolate will balance the temperature of the melted chocolate, creating a natural tempering. You can speed up the process by placing the bowl in another bowl of cold water, but make sure not even a drop of water touches the chocolate!
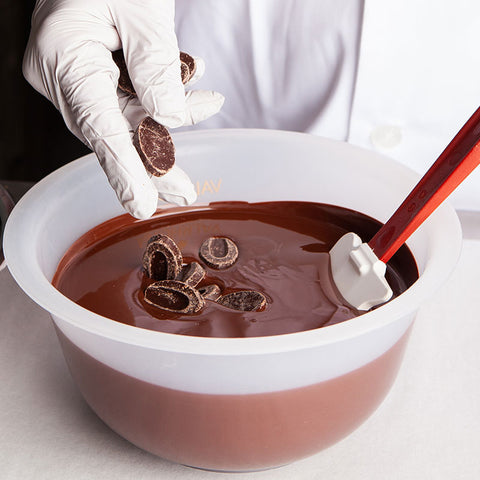
Microwave Tempering
For this method, we highly recommend you use a microwave-safe bowl to avoid rising temperatures. Start by placing your chopped chocolate in the bowl and microwave for 20 seconds. Take it out and stir with the spatula, then repeat 10 seconds at a time. Stop when the chocolate is ¾ melted then just keep stirring until it’s well dissolved.
Which one of these methods will you try?